In this article, you will learn:
- How WEDOS Protection secures WordPress
- How to set up Protection via WordPress plugin
- Troubleshooting common issues
- Frequently asked questions
WordPress Security
The WordPress content management system is very popular, as are various kinds of attacks against webs that run it. Even if these attacks fail to breach the web or admin interface, they significatnly increase server load and slow your website down. That’s why WEDOS Protection aims to stop this unwanted traffic before it even reaches the web server.
WEDOS Global Protection uses the following methods to protect WordPress websites:
- Blocking requests accessing the following files:
xmlrpc.php, unless the request comes from WordPresswp-config.php.htaccesswpad.dat- PHP in the
wp-content/uploadsfolder - PHP in the
wp-includesfolder wp-admin/admin-ajax.php,unless the request comes from WordPress or Google
- Using captcha:
- for
wp-login.php(admin, wp-admin) - for requests from IPs with bad reputation scores (according to UDGER ⧉)
- for
The system also monitors traffic from various IP addresses. If an address makes too many requests over a time period, the system temporarily denies it further access.
All static content (return codes 200, 301, 302) also remains cached for 10 minutes by default.
WordPress Plugin
You can now download and install the WEDOS Protection WordPress plugin ⧉ directly. This has the following advantages:
- Free Start plan and extended Advanced trial (see WEDOS Protection pricelist ⧉)
- Management via WordPress admin panel instead of WEDOS Global admin panel ⧉ (the latter is still available).
Installation Guide
You can install the WEDOS Protection plugin as any other WordPress plugin. The easiest way is via the WordPress admin panel:
- Log into your WordPress administration panel.
- In the left menu, select Plugins Add New Plugin.
- Search for the WEDOS Protection keywords.
- On the WEDOS | Protection & Cache Performance card, click the Install button, followed by the Activate button.

Plugin Activation
Activate the plugin by following these steps:
- Log into your WordPress administration panel.
- In the left menu, select WEDOS Protection.
- Click the Start Protection Setup button.
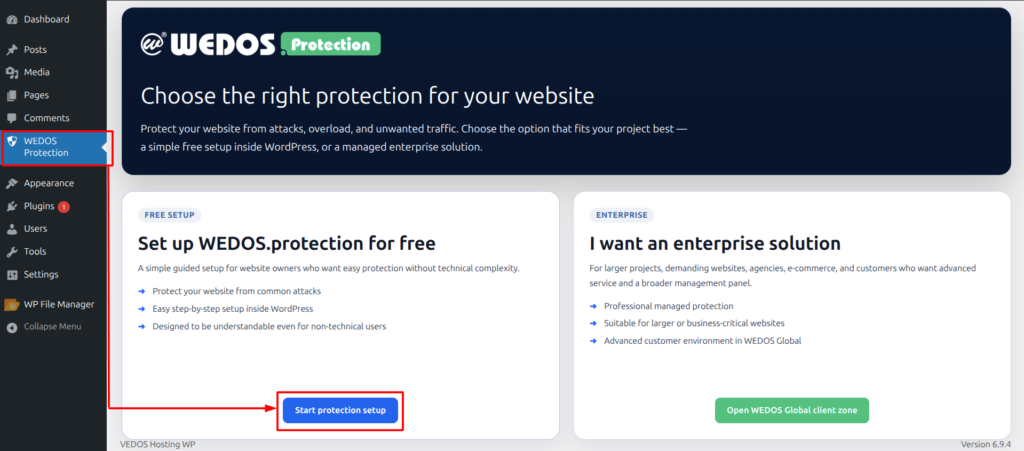
This will open a setup wizard.
- Website Information. Check the host domain, WordPress server IP and type A DNS records. Update your email if necessary, click the Create Request button and Continue.
- DNS Setup. Set up values according to the provided instructions with your current DNS provider. Pay attention to your provider’s name and record type specifications and adjust copied values accordingly.
For WEDOS DNS, the correct entries are:
- Domain Verification: Enter the record name
_acme-challengeand choose typeCNAME. Copy the Value into the Data field. - Main Domain Routing: Leave the record name blank and choose type
ALIAS. Copy the Value into the Data field. Next, create another record with the namewwwand choose typeCNAME. Copy the same Value into the Data field.
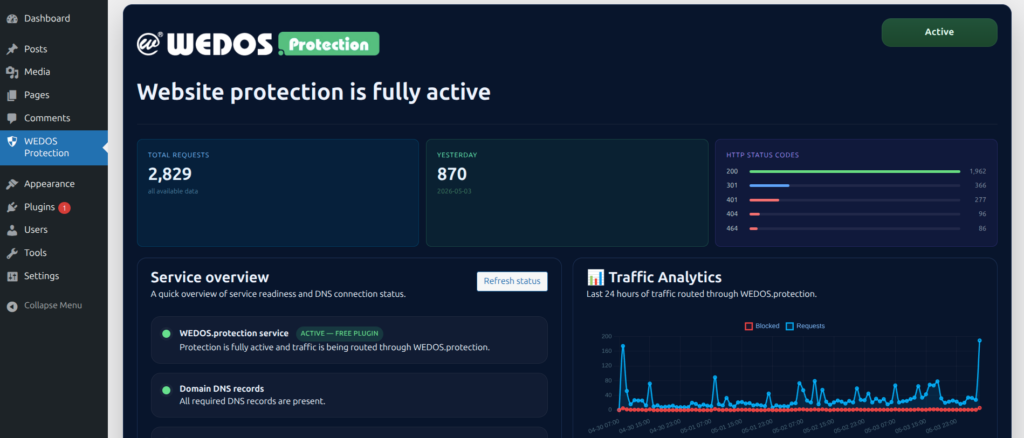
Once DNS is configured correctly, WEDOS.protection activates.
FAQ
No Frequently asked question for the current version.